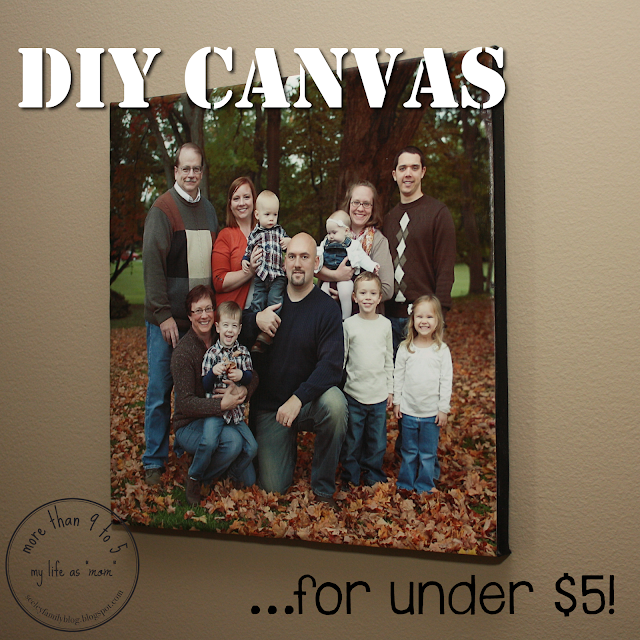
I have been wanting to try making my own canvases for awhile now, but had never gotten around to it until this past weekend. I wasn't really sure how I wanted to do it, but finally decided to just give it a try and see how it looked. Given how much the kids are constantly changing, and the fact that our family is still growing, I didn't want to spend hundreds of dollars to have canvases professionally made every 6-12 months. So, I decided to try making my own to save us some money! I was pretty happy with how they turned out, especially given the fact that I spent less than $5 for each of them!!
I decided to purchase 2-12x12" and 2-9x12" canvases for this project. Since I was printing the pictures (taken by our wonderful photographer, Kristy Vest) at home, 13x19" is the largest print I can make with my wide-format Epson printer. I have some 11x14" canvases to use for another project, but wanted to display these pictures in a square pattern, so using all canvases with a 12" side worked best for this. I purchased my canvases at Michaels, as they were 50% off. I was able to get the smaller two for $1.75 each and the bigger ones for $2 each. What a steal! If you'd prefer to shop online, you can find great deals on canvases there, too!
Here is my step-by-step tutorial for making your own canvas at home:
Supplies:
- Canvas(es) (I used Artist's Loft canvases)
- Black acrylic paint (I used Martha Stewart Crafts Multi-Surface Satin Acrylic Paint in beetle black)
- Paintbrush
- Photos (printed on premium matte photo paper)
- Mod Podge (I used the matte variety)
- Foam brush
Step 1
Start by painting the edges of your canvas with the acrylic paint and the appropriate sized paintbrush. The canvases I purchased were just 1/2" thick, but you can purchase thicker ones if you desire.
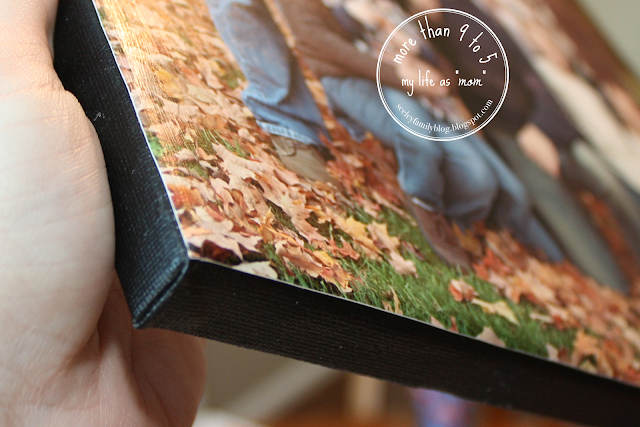
Be sure to coat onto the front of the canvas, over the edge, so no white will be showing when you place your picture on.
Step 3
Also be sure to coat well onto the back of the canvas, too, so no white will show there either, while canvas is hanging.
Step 4
Let the paint dry for 20 minutes and ensure that the edges are well-coated. Give it another coat if needed (I only needed one coat), then grab your bottle of Mod Podge. I used this matte variety and was very happy with how well it worked.
Step 5
Coat the entire front of the canvas with a generous layer of the Mod Podge, using your foam brush.
Step 6
Place your printed picture carefully on the front of the canvas, turn the canvas over and apply pressure to the back of the canvas, smoothing it out from the middle to the edges, to eliminate air bubbles.
Step 7
Turn the canvas back over and ensure that everything is lined up how you want it.
Step 8
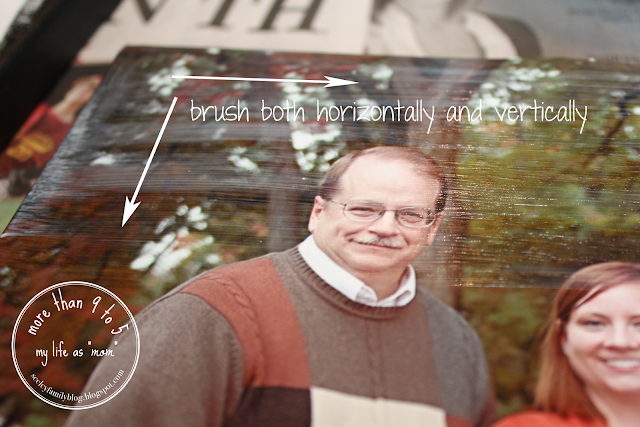
Apply a coat of Mod Podge on top of the picture using your foam brush. Brush it both horizontally and vertically onto the picture, using small strokes.
Step 9
As you apply the Mod Podge (foam brush is pictured), the print may develop air bubbles on the sides as it is saturated with the glue.
Step 10
Apply a generous amount of Mod Podge to the edges. Using your fingers, tightly hold down the edges of the picture to the canvas, for about 20 seconds, to get rid of the bubbling.
Step 11
Repeat this step around all of the edges to secure the print, not leaving any space between the print and the canvas. You can clean up the excess glue on the edges with a wet paper towel.
Step 12
Allow the first layer of Mod Podge to dry (at least 20 minutes), then apply another layer to be sure you didn't miss any spots. Allow it to dry one more time, then it's ready to hang! The Mod Podge gives the photo a great glossy finish with a nice texture that resembles an actual canvas.
Please feel free to ask any questions about this process if any of my steps are not clear. This was my first attempt at trying to make my own canvas, and when I started, I didn't know how it would turn out. I was very happy with the results and surprised at how closely it resembles an actual professional canvas print! It may not look completely perfect, but for under $5, it looks pretty darn good! :)


Twilight zone. Pretty crazy we posted about the exact same thing today, lol. Your canvas photos turned out great! I love the photo - beautiful family!
ReplyDeleteThanks for living your link in the comments! I think it is great for all of our readers to have different examples and techniques so they can find what works for them.
Cute blog too! I will be back :)
I guess it was a good day for canvases! :) Thank you! They definitely turned out even better than I had hoped - a pleasant surprise! :)
ReplyDeleteYes! There are so many ways this could be done and it's nice to know what others have tried and succeeded with as well. :) I will have to try getting prints made for the bigger canvases I want to do, too, so thanks for the tip about where to have them done!
Thank you so much!! I'm excited to check out more projects on your blog today as well. :) I'm your newest FB fan!
Love both you ladies canvas's! First, thank you,you saved my christmas presents for family,due to budget..Ive have always wanted canvas prints, wow,this is great.One question, never used mod podge,what are the results difference in using matte v/s gloss?
ReplyDeleteThank you so much, Michelle! I love that these canvases are an affordable option for you! :) Even when I find canvases on sale, it's so much money, so I love doing them myself. I've actually never used the glossy mod podge, so I'm not sure how different the results would be. The matte has a bit of a shine to it - the perfect amount, in my opinion. I would be afraid that with the glossy, you would get a lot of reflection of light on the pictures, which I try to avoid. Ginger may have some insight on this if you would like to reply to her comment, or comment on her blog. :) Thanks so much for visiting!
ReplyDeleteI had same thought about shine,dont wont to shiney, thanks so much for the reply..Ill let ya know how they turned out!! Wish me luck!(not very crafty but i think I can manage this one)lol Have a great evening!
ReplyDeleteYou're welcome! I can't wait to hear how yours turn out!! I think you'll do just fine. :) You too - Merry Christmas!
ReplyDeleteDid you do two layer of mod podge on the top of photo?
ReplyDeleteYep, Maria! I allowed the first layer to dry (about 20 minutes), then applied another layer, in case I had missed any spots. Since it's clear, it can be hard to tell if you're getting it all covered well. :)
ReplyDeleteThanks for this wonderful diy project. I also love doing these stuffs. I just want to ask how to place the photo on the canvas; does the front of the photo habe to face the front side of the canvass or the other way? Need a response ASAP.
ReplyDeleteYou're welcome, Aishah! You want the photo side to be facing out, not towards the canvas. You're placing the photo on the canvas front. The canvas is basically just being used as your "frame," as you aren't seeing the front part of it - just the sides. Thanks for reading!
DeleteWhat epson printer do you have because your pictures look waaaaay better then mine print out and I have an epson made especially for printing pictures!!!
ReplyDeleteWhen I printed these canvases I had the Epson Stylus Photo 1400 Inkjet Printer. It was made for printing photos and could also do wide-format printing. It did a fabulous job. I recently replaced it though as it was damaged in a move. They no longer make this one, so I bought the one they recommended as a replacement (Expression Photo HD XP-15000 Wide-Format Printer) and it has done a great job, too!
ReplyDelete