Friday, June 24, 2011

Chocolate Goodness!

Reading a friend's blog the other day, I came across a recipe she had tried for an absolutely irresistible looking brownie cookie that I had to make. She had come across it on another blog that she reads. The recipe was for Ghirardelli Brownie Cookies...


Ever since Josh and I visited the Ghirardelli Chocolate and Ice Cream Shop in San Francisco in 2007, we have been hooked on this chocolate. I am normally not a fan of hot fudge (I know, what's wrong with me?), but when you have a bit of freshly made hot fudge at their shop, it will turn even a hater like me into a fan! Whenever I make brownies now, I buy one of their packaged mixes to use. So, the thought of a tasty Ghirardellli cookie was delightful! We had friends over for dinner tonight, so I thought, what better time to try out this new recipe then for our guests?

Ethan and I gathered the ingredients and went to work.


Ingredients:
  • 1 Ghirardelli brownie mix (I used double chocolate, so it already had chocolate chips in it)
  • 2 eggs
  • 1/3 cup oil
  • 3 Tbsp flour
  • 1 1/2 cups of peanut butter chips, or nuts, can be mixed in (optional)
Directions:
  • Mix flour into brownie mix.
  • Slightly beat eggs with oil and mix in.
  • Mix-in any add-ins until combined. The dough should be stiff like cookie dough.
  • Bake at 350 degrees for 10-11 minutes, depending on the size of the cookies. Use less time for cookies that are 2" or smaller. One recipe will make 24-30 cookies, depending on the size. 
  • Let cookies rest on pan for 2 minutes, and then cool on baking racks.

I decided that I wanted to add in both peanut butter chips (because nothing goes better with chocolate than peanut butter, right?) and nuts (their nutritional benefits made me feel better about stuffing my face with chocolate), so I added 1/2 cup of sliced almonds (that was all I had left) and 1 cup of peanut butter chips, to equal 1 1/2 cups total add-ins. :) I was planning to use walnuts, but didn't realize I was out of them, so I used the almonds instead. I think that the walnuts may work better with this recipe, but the almonds were still good too. The only change I made to the recipe was that I baked them for 12 minutes. My batch yielded 24 cookies. They were SUPER tasty and definitely did not disappoint! I will surely make these again. :) Let me know what you think if you try them out too!

Tuesday, June 21, 2011

Happy Father's Day!

We kept it simple this year for Father's Day. We decided to pack up Ethan and Daisy and head to a local park (Clark Park) on West Point Lake for a picnic dinner. We packed up some goodies at home and stopped at Publix to get some subs, then made our way to the park. Though the day had been another hot one, it felt great sitting at a picnic table as the sun was setting.

Ethan enjoyed his GoGurt...


He's such a little sweetheart! :)


And here is Daddy with his kids! :)


We'll definitely have to plan more trips to the lake this year! We also spent a majority of the day giving the house a very thorough cleaning. I guess we were both nesting! ;)

Ethan and I made another trip to the park today. We had the area all to ourselves for quite awhile and he was loving it, going down slide after slide, only taking water breaks when I made him. 


A few more kids showed up later, including a particularly aggressive little 4/5-year-old girl. For some reason, this girl decided she wanted to chase Ethan around the playground. Ethan was not impressed. He kept trying to shove her away anytime she caught him, but she wasn't getting the hint. :( Eventually, he gave up and decided he wanted to leave. Poor guy. Fortunately, Mommy made it all better with a stop at the local smoothie shop on our way home for a yummy treat! I'm hoping we can get a few more trips to the park in before this little guy arrives, but we shall see. I am 37 weeks today, which means that I am technically full-term and he could arrive at anytime now! I am not holding my breath though, given how late Ethan arrived. But, at least I feel ready this time, so I am excited to meet this little man! :)

Saturday, June 18, 2011

Family Pics

I decided I wanted to get a family pic of the four of us tonight. Probably the last pic we will get before we become a family of five in a few weeks! Yes, I do count Daisy in our numbers. ;) I was ecstatic with the results!! Who needs a photographer when you have a nice camera and a tripod?? ;)

First attempt wasn't the best since Ethan was a bit hidden by my huge belly and Daisy wasn't paying attention...


But the next attempt was PERFECT! I'm still not sure how we managed to get everyone looking and smiling with eyes open, but I'll take it! :)

Wednesday, June 15, 2011

Tasty Playtime Treat! :)

Over the weekend I had a spur of the moment idea that it would be fun to make some playdough for Ethan. He is really starting to get into coloring now, so I thought this would be a nice creative outlet as well for him. We had plenty of time on our hands with Daddy at work, so what better way to pass the time? I remembered an episode of Jon & Kate Plus 8 that I had watched awhile back (before it became just Kate Plus Eight) where they made edible playdough. Being that Ethan is just 2 and still enjoys putting things in his mouth occasionally to figure out what they are, I thought it would probably be a good idea to go the edible route...

So, I searched for Kate's recipe online and found this recipe. It calls for equal parts of peanut butter, honey and powdered milk with some added flour to achieve the right consistency. On another site, I read that powdered sugar was also a nice alternative to the powdered milk (and tasted better), but to use 2 parts of it for every part of the other ingredients.


So, I used one cup each of peanut butter and honey, then just 1/2 cup powdered milk and one cup of powdered sugar. I mixed them all together in my KitchenAid stand mixer. I added some flour at the end, but I didn't measure how much.


And here is Ethan ready to play with the final product...


It didn't take him long at all to figure out that he could eat the playdough...hmm...


We had fun playing with the tasty dough, but I did find it to still be too greasy. I think that I should have added even more flour to remedy this and give it the proper consistency. If I decide to make another batch, I think I will also stick to just powdered milk instead of the powdered sugar, as it was plenty sweet!

Earlier in the morning that day, Ethan and I visited our local farmer's market for the first time. I was hoping to find some local honey to use for this recipe, but unfortunately, no one had any. We did manage to score some homemade strawberry jelly, strawberry-blueberry jam and fresh harvest grain bread. It made for a very tasty lunch for us! I think we will have to continue to check out the market to see what other tasty goodies we can find. :)

In other news this week, I had a bit of a scare when my dishwasher wouldn't start one evening!! Not exactly what a 36-week preggo woman wants to discover when doing dishes by hand is probably one of the most miserable chores to do while pregnant. Fortunately, I had my two handymen available to help get it working for me again! :)


Poor Ethan also got his first time-out ever this week. :( When he was in trouble the other night, Josh told him to follow him to the corner and stand there until he stopped crying and could behave himself again. We really had no idea what he would do, but decided to try it out. Much to our amazement, he stood there, with his little nose pressed into the corner as he composed himself. Awesome - time out success!! Unfortunately, Ethan earned another timeout the very next day when he wouldn't listen to me. I was again surprised at how well he took his punishment and that it seemed to be quite effective. Later in the day I warned him that he was going to get another timeout if he didn't stop ramming his Chuck truck into the wall. He quickly stopped, but I guess he felt that Chuck was the real instigator and he proceeded to give Chuck a timeout in the corner for the rest of the evening. Too funny! I swear that boy never ceases to crack me up with his antics!

I also finally realized today just how close we are to this baby boy's arrival. Just 4 short weeks!! Wow. Where did the time go? That being said, I decided that I need to start taking advantage of the time that Ethan and I have left during the day as a twosome, before things get really crazy around here again. So instead of staying cooped up inside the house as usual this morning, we made a trip to a local park to play! Despite the heat, I lasted for an hour and by the time we left, we were both covered in sweat and craving something cool. We stopped at McD's for a delicious frozen strawberry lemonade and some tasty chocolate chip cookies. ;) Yum! As you can see from the pics, Ethan thoroughly enjoyed his time on the slides at the park and I hope that we can make it there again soon.


It appears he wore himself out as he is currently in the midst of a 3+ hour nap now! :)

Wednesday, June 8, 2011

Hot Eats and Cool Treats!

Nope, I'm not talking Dairy Queen. I finally got around to trying a new recipe last night!! I found this one in the April 2011 issue of Parenting. The recipe is for Spiced Chicken Mini-Burgers with Peanut Sauce and was created by Ana Kelly.

I gathered my ingredients and went to work.


Ingredients:
Burgers
  • 1 lb ground chicken
  • 2 tsp red curry powder
  • 1 Tbsp peeled, grated fresh ginger
  • 1 tsp salt
Sauce
  • 1/3 cup natural peanut butter
  • 1 Tbsp honey
  • 1 Tbsp lime juice
  • 1 Tbsp soy sauce
  • 2 Tbsp water
Directions:
  • Preheat broiler. Combine ground chicken, curry powder, ginger and salt, mixing well.
  • Form into 12 balls and flatten to 1/3-inch-thick patties. 
  • Broil 3 to 4 minutes per side, or until cooked through and lightly browned.
  • Combine peanut butter, honey, lime juice, soy sauce and water in a glass bowl.
  • Microwave on high for 30 seconds, then whisk until smooth.
  • Split a dozen mini-pita rounds. Place chicken patties inside pita rounds, and top with a dollop of peanut sauce and 2 cucumber slices.
As for changes I made to the ingredients/recipe...I don't think I used an entire tablespoon of ginger, but there was a decent amount of it. I used regular Jif peanut butter instead of a natural PB. Also, instead of forming 12 small patties, I made 4 normal sized patties and 1 small one (for Ethan). These were super, super moist and very hard to work with. I guess ground chicken is a much moister meat? I also did not broil the burgers. Josh grilled them instead. He gave them about 12 minutes on medium-high (~350 degrees or so) heat. Here they are after being grilled...


I couldn't find mini-pita rounds at the store, so I bought whole-wheat sandwich thins instead. They are basically like a regular bun, but much thinner (similar to the thickness of a slice of bread). I also did not get any cucumber slices, but those may have been a good addition if you like cucumber (I obviously don't). ;) I served the 'burgers' with baked sweet potato fries, a family favorite, and I think they went very nicely together. Here is the 'burger' dressed with it's sauce...


And a pic of the inside...


I must say that these were quite tasty!! Even Josh said that he would eat them again!! Woohoo! If you remember, he was not a fan of my turkey burgers, but said that these were much better than the turkey. The chicken patty by itself had a lot of great flavor with the curry and ginger and even had a bit of a nice kick to it. I really like how the sauce paired with the chicken too. Unfortunately, Ethan wasn't a fan of the meat (not surprising though since the only 'meat' he eats these days is hot dogs and the occasional breaded chicken nugget or fried fish strip). :( He did enjoy dipping his hot dog in the peanut sauce though! haha! This coming from the boy who dips everything in ketchup (and who loves to just lick it off and keep re-dipping until the piece of food is barely recognizable anymore)!! Ahh, my lovely child.

As a follow-up dessert to the meal, I decided a nice cool treat should accompany our hot and spicy dinner. Given the number of mid-to-high 90-degree days we have had here lately, anything cool is nice and refreshing! We have become frequent customers at our newly opened local smoothie shop. They can make a mean smoothie from a nice variety of fruits to one of our favorites, PB&J (peanut butter, strawberries, bananas and yogurt). My personal favorite is still their Tropical Twister. It has strawberries and pineapple with orange juice. It is also supposed to include fresh coconut, but I hate the texture of it, so I have them skip adding that to mine. So, I have been wanting to try to recreate the wonderful flavor of the Tropical Twister here at home. Here's how it went...

I gathered the ingredients I would need.


We have a great smoothie maker that we received as a wedding present. It is labeled on the side with exactly how much liquid and frozen ingredients I need in order to make enough for 2 or 4 servings. So, I filled it to the liquid line with orange juice, then added in about equal parts of frozen strawberries and pineapple.


I blended everything together well, and viola! Tropical Twister smoothies in my own kitchen! :)


The taste was pretty close to the one I get at the smoothie shop, but I think it could have maybe benefited from a little more pineapple and less strawberry to give it a tad more sweetness. It was still good and refreshing though. :)


And of course Ethan loved it! :) I can't get the boy past the smoothie shop if he sees it!! Enjoy!

Monday, June 6, 2011

Little Man is Growing Up! :'(

I know it is inevitable, yet that still doesn't stop me from getting a bit teary-eyed thinking about how much Ethan has grown in the last 27 months. There are days that I fear if I blink my eyes too long he'll be going off to college and I will not know where the time has gone. But yes, there are definitely other days that seem to drag on forever (you know, the ones where he is acting like a stubborn two-year-old, and I can't wait for Daddy to get home!) haha! It really hit me hard a couple weekends ago as I was washing up all of his old newborn outfits to get ready for the baby's arrival. Was he really once that little?!? Seems hard to believe now and sadly, hard to remember already (which is why I need to blog more frequently - so I can better remember these moments)! I know I need to start taking in every moment and savoring it because before I know it I will be shipping him off to kindergarden and the rest will be a blur...

Last week we hit another milestone. The big boy bed. More tears! We finished painting his room (a HUGE thank you to Grandpa Frank for doing the majority of the painting while he was here visiting!!), hanging the curtains, and getting everything back in place on Tuesday evening. So, we decided to take the plunge and see how it would go moving him into it. He has been excited about his new bedroom for weeks, always wanting to go in and see it and play on the top bunk (yikes)!


When my parents arrived last Thursday (for Memorial Day weekend) for a visit, the first thing he did was lead them upstairs to check it out! Too cute!! :) But, apparently playing in his new room was all he had in mind the first night...there were tears. Lots of tears. Not only was he adjusting to a new bed, but also a whole new room! We tried to keep other things the same by putting his blanket and animals and cars in bed with him and dressing him in the sleep sack he normally wore at night. But the first thing he did after we left the room was climb back out of the bed. Hmm. Not good. We went back in and put him back down, which made him upset, but fortunately he stayed in the bed this time. He eventually cried himself to sleep (not exactly how I had envisioned the first night going), but he was asleep. Whew!

The next morning he awoke at 8 am. Ouch. Definitely early for him (especially considering that it was pretty late before he finally fell asleep the night before), but still a manageable time. Not sure if it was just the newness of it all that awoke him early or the fact that the room was much brighter than usual. Unfortunately the sun comes up on that side of the house and it gets quite bright at a very early hour right now. He was in a great mood when he woke up, despite the baggy eyes he was sporting due to all of the tears shed the night before (yep, poor guy gets that one from me).


Naptime was also quite an adventure the first day. With nothing there to stop him from getting out of bed, he was up instantly and out roaming around the room. I decided to let him roam just to see what he would do and if he would crawl back in the bed himself. Hmm, not so much. After about 30 minutes, I gave up on him getting back in bed himself, so I went in and put him back in bed and told him he had to stay there. Of course, more tears! :'( But at least this time after just 10 minutes of crying he finally fell asleep.

Things definitely got better and easier as the week progressed. Now he crawls into bed with no issues and stays there without trying to get out of bed. He has been falling asleep quite quickly too with no more tears!! Yay!!! :) Still waking up a bit earlier than I would prefer, but I can't really complain.

His room still needs some more finishing touches (pictures, art and a toy storage system), but here is what we have so far...


I purchased the super cute transportation bedding, made by Circo, at Target. There's a quilt and sheets on each of the beds. And of course I couldn't resist the adorable car pillows (Ethan is snuggling with one of them below)! :) Ethan is a big fan of his cars and trucks room! The lime green Eclipse Bailey curtains and Room Essentials stick lamp were also purchased at Target. The cute, red laundry basket was purchased at IKEA and the furniture (bunk beds and dresser) was purchased at Goree's Furniture in Opelika, AL. The paint on the walls is Behr's Ultra Premium Plus (satin finish) in Riviera Blue (540B-5), purchased at Home Depot.

Wednesday, June 1, 2011

Adventures in Cake Pops: Part II

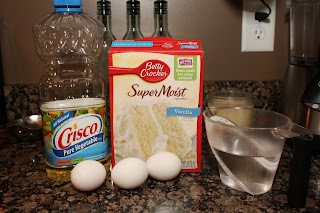
It's time for the much anticipated sequel to my first post about my experience with making cake pops! haha!  My parents came to visit for Memorial Day weekend, so I thought it would be the perfect time to make another batch of these delicious little treats. This time I wanted to try using a boxed cake mix (to get that typical cake batter flavor) and my own, homemade buttercream frosting. I chose to use Betty Crocker's super moist white cake mix.


I just followed the directions on the box and baked two 8" round cakes to save a little time. Once they were done and cooled, I trimmed off the sides and bottoms and crumbled what was left into my bowl.


Then I made my own buttercream frosting. I loosely followed a recipe and combined 1/2 stick butter, 1/2 cup Crisco, about 2 cups powdered sugar, 1/4 cup milk and a dash of vanilla extract. I ended up adding more milk to get the consistency that I wanted.


Then I made my first mistake. :( I added frosting to the cake crumbs - what I approximated to be about the same amount as the can of store-bought frosting I had used last time. I mixed it all together well and it was super mushy. So mushy, in fact, that trying to form balls was not working well. Ugh. I went ahead and continued, hoping that the freezing process would help firm up the balls. No such luck. After the 15 minutes in the freezer was up they were still mushy. Too mushy to try coating. Unfortunately, I had already started preparing my coating. This time I wanted to try using some yummy Ghirardelli white chocolate instead of the candy chips.


I used a double boiler technique and put water in a big pan, cranked the heat and allowed it to start steaming. In the pan on top, I broke the chocolate into small pieces and allowed the steam to melt the chocolate.


Everything was going great and the chocolate was a nice, smooth consistency. It happened quite quickly too - it melted completely in maybe 5 minutes? I wanted to add some almond flavoring to kick it up a notch, so I did this, and I fear (after a bit of googling) that by doing that and also allowing the chocolate to get too warm, it started to seize up. :( Ugh. Fail number two! So, I added some vegetable oil (at the recommendation of a few websites) and took it off the heat and this helped. Shortly after this was when I discovered that my balls weren't firming up as I had hoped, so I had to give up for the night. Major bummer.

The next day I made a trip to the store and bought another box of Betty Crocker white cake mix. Same as before I baked a couple 8" rounds and added this cake to the mix I already had. I had kept it cool in the fridge in the meantime, so it was still usable. Success!! This appeared to be the correct cake to frosting ratio that I needed. I sampled it and it tasted just like Starbucks' cake pops! Awesome! I formed the cake balls and stuck them in the freezer. Then it was time to tackle the coating. The chocolate had hardened completely overnight so I decided to just try heating it back up again, using the same double boiler technique. Fortunately, this worked great. I kept the heat very low so as not to overheat it. Then I started assembling the cake pops. The chocolate was working fairly well to coat the balls but the only issue was that the chocolate was not setting up/hardening as quickly/easily as the candy coating had. As a stroke of luck, I happened to be doing all of this in the middle of getting dinner ready, so I had to take a break for dinner. I left the cake balls in the freezer, so they ended up having at least an hour in there before I got back to them to start coating again. I say that I was lucky because this ended up being just what they needed! The balls were nice and firm and by being extra cold, the chocolate hardened very shortly after coating them this time! Yay!! Perfection!!


I think the thickness of the coating was perfect on these and the consistency and taste of the cake (nice and moist) was spot on with Starbucks' version! Woo hoo! This picture is of one of the first ones I made that wasn't really hardened completely. The rest looked/tasted even better than this one.


So, I think I have found a winner for a recipe for these using the boxed cake mix (with that familiar cake batter flavor) with the better flavored homemade buttercream frosting (instead of yucky canned frosting). I think either coating (the candy chips or chocolate) is good, but using the double boiler technique for melting is the key to this working properly. Whew! I hope you have enjoyed this cake pop journey with me. Let me know if you try making some of your own! :)