Thursday, April 25, 2013

Baby Bump Update: Week 20

Here I am at 20 weeks! I can't believe we're halfway there already!!


At least I have a tiny bit of color this time, which isn't saying much, but better than my skin matching my white tank top! Haha! Hoping to have a nice tan after our upcoming beach trip!! :)


Week of Pregnancy: 20 weeks, 2 days

Baby size: Baby is the length of a banana this week!


Baby is about 6 1/2 inches from head to bottom, and 10 inches from head to heel. Baby weighs between 1/2 and 3/4 pound.


Symptoms: It appears that the nausea may have finally subsided within the last week. Whew. Back and hip pain are probably my biggest complaints right now. It's hard to get comfortable for sleeping and I feel like my back is going to give out on me most of the time when I stand up. Acid reflux is up there, too. I don't remember these things starting this early with my other pregnancies, so I hope it's not a long ~20 weeks to go!

Food cravings: EGGS! More specifically, sunny side up eggs. Growing up, we called these "dipped" eggs, because we dipped our toast into the runny yolks to soak it up. So good. As an adult, this is something I usually only have when we're visiting my parents, but I have been craving them so much the past few weeks. I am fortunate that Josh has been making them for me now every weekend. :) I could probably eat them every single day, but we may have to invest in some chickens for that to happen!

Food aversions: Nothing specific. I'm finally able to drink my morning coffee again now, though! Woo hoo!

What I'm excited about: My 20-week ultrasound!! We haven't found out the sex yet, as we are waiting to find out when we get family pics taken in a couple of weeks. We'll be doing a gender reveal with cupcakes! :)

Baby Seeley looked great - measured right on with my due date, and weighed in at 13 ounces!

What I've done to prepare for baby: Sadly, still nothing, at this point, unless you count buying maternity clothes for myself?? That should be changing soon, once we know the sex!

Funny moment: The other night Ethan said, "It will be so good when the baby is here. I can give the baby the toys I don't play with anymore. Like some race cars." So I asked, "What if the baby is a girl? Will she want race cars?" Ethan responded, "Not the preschool girls, but the baby will." So, I clarified, "Oh, so the girls at preschool don't like cars, but a baby sister will want your cars?" Ethan said, "Yep!" :)

Just for fun, I looked through some old pics to find the pic on the right...so here's a pic of Ethan with my 20-week belly this year, and then almost exactly 2 years ago, with my 27-week belly!


He'll make such a great big brother...again!

Noah is excited to be a big brother, too, even if you can't really tell in this pic, taken while we waited for my doctor this morning. ;)


I can't wait to return in a couple weeks to reveal the gender of baby #3!! :)

Tuesday, April 16, 2013

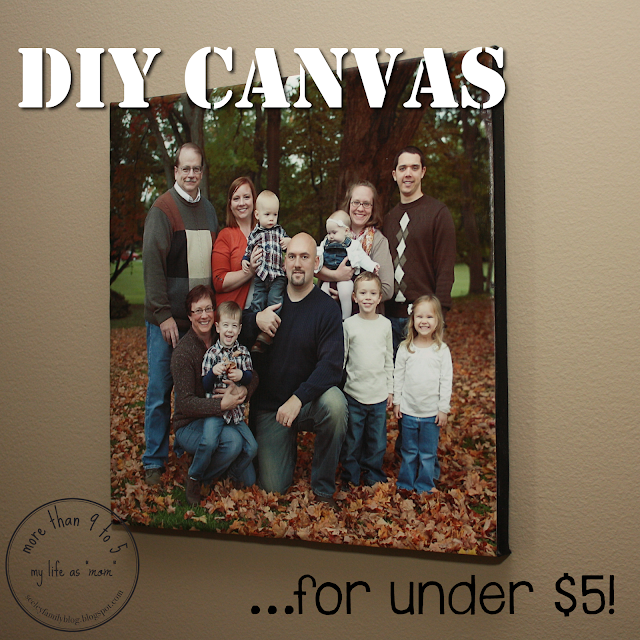
DIY Canvas...for under $5!

Welcome to those of you visiting from the Literally Inspired blog! I hope you find this DIY Canvas tutorial to be helpful. :) If you enjoy DIY projects, please check out some of my other projects, like this great DIY paint chip calendar, my "kids' station" in the hallway for displaying their artwork, or my solution for meal time organization. Thanks for stopping by!

I have been wanting to try making my own canvases for awhile now, but had never gotten around to it until this past weekend. I wasn't really sure how I wanted to do it, but finally decided to just give it a try and see how it looked. Given how much the kids are constantly changing, and the fact that our family is still growing, I didn't want to spend hundreds of dollars to have canvases professionally made every 6-12 months. So, I decided to try making my own to save us some money! I was pretty happy with how they turned out, especially given the fact that I spent less than $5 for each of them!!

DIY Canvas...for under $5! | more than 9 to 5: my life as "mom"


I decided to purchase 2-12x12" and 2-9x12" canvases for this project. Since I was printing the pictures (taken by our wonderful photographer, Kristy Vestat home, 13x19" is the largest print I can make with my wide-format Epson printer. I have some 11x14" canvases to use for another project, but wanted to display these pictures in a square pattern, so using all canvases with a 12" side worked best for this. I purchased my canvases at Michaels, as they were 50% off. I was able to get the smaller two for $1.75 each and the bigger ones for $2 each. What a steal! If you'd prefer to shop online, you can find great deals on canvases there, too!

Here is my step-by-step tutorial for making your own canvas at home:

Supplies:
Step 1
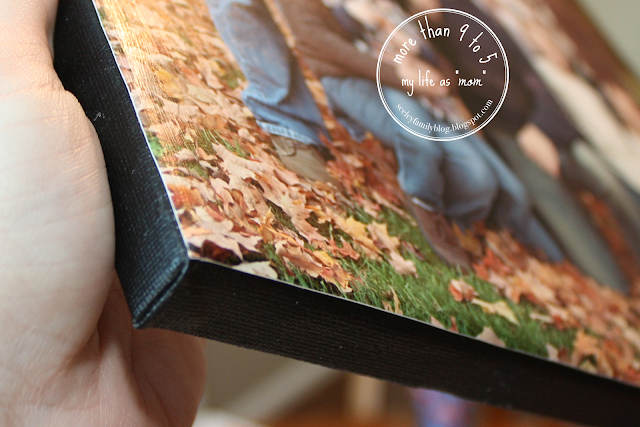
Start by painting the edges of your canvas with the acrylic paint and the appropriate sized paintbrush. The canvases I purchased were just 1/2" thick, but you can purchase thicker ones if you desire.

DIY Canvas...for under $5! | more than 9 to 5: my life as "mom"

Step 2
Be sure to coat onto the front of the canvas, over the edge, so no white will be showing when you place your picture on.


DIY Canvas...for under $5! | more than 9 to 5: my life as "mom"

Step 3

Also be sure to coat well onto the back of the canvas, too, so no white will show there either, while canvas is hanging.


DIY Canvas...for under $5! | more than 9 to 5: my life as "mom"

Step 4
Let the paint dry for 20 minutes and ensure that the edges are well-coated. Give it another coat if needed (I only needed one coat), then grab your bottle of Mod Podge. I used this matte variety and was very happy with how well it worked.


DIY Canvas...for under $5! | more than 9 to 5: my life as "mom"

Step 5
Coat the entire front of the canvas with a generous layer of the Mod Podge, using your foam brush.


DIY Canvas...for under $5! | more than 9 to 5: my life as "mom"

Step 6
Place your printed picture carefully on the front of the canvas, turn the canvas over and apply pressure to the back of the canvas, smoothing it out from the middle to the edges, to eliminate air bubbles.


DIY Canvas...for under $5! | more than 9 to 5: my life as "mom"

Step 7
Turn the canvas back over and ensure that everything is lined up how you want it.


DIY Canvas...for under $5! | more than 9 to 5: my life as "mom"

Step 8
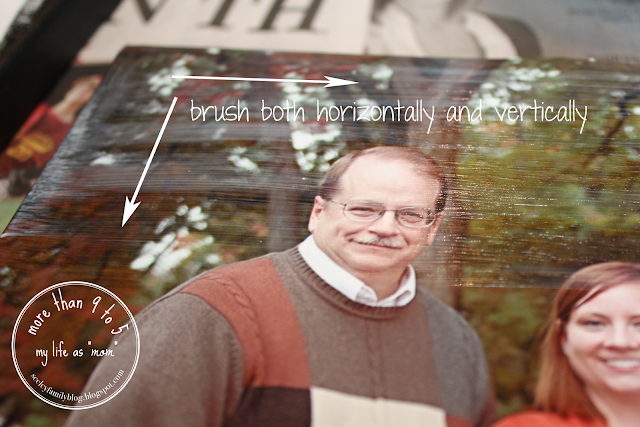
Apply a coat of Mod Podge on top of the picture using your foam brush. Brush it both horizontally and vertically onto the picture, using small strokes.


DIY Canvas...for under $5! | more than 9 to 5: my life as "mom"

Step 9
As you apply the Mod Podge (foam brush is pictured), the print may develop air bubbles on the sides as it is saturated with the glue.


DIY Canvas...for under $5! | more than 9 to 5: my life as "mom"

Step 10
Apply a generous amount of Mod Podge to the edges. Using your fingers, tightly hold down the edges of the picture to the canvas, for about 20 seconds, to get rid of the bubbling.


DIY Canvas...for under $5! | more than 9 to 5: my life as "mom"

Step 11
Repeat this step around all of the edges to secure the print, not leaving any space between the print and the canvas. You can clean up the excess glue on the edges with a wet paper towel.


DIY Canvas...for under $5! | more than 9 to 5: my life as "mom"

Step 12
Allow the first layer of Mod Podge to dry (at least 20 minutes), then apply another layer to be sure you didn't miss any spots. Allow it to dry one more time, then it's ready to hang! The Mod Podge gives the photo a great glossy finish with a nice texture that resembles an actual canvas.


DIY Canvas...for under $5! | more than 9 to 5: my life as "mom"

Please feel free to ask any questions about this process if any of my steps are not clear. This was my first attempt at trying to make my own canvas, and when I started, I didn't know how it would turn out. I was very happy with the results and surprised at how closely it resembles an actual professional canvas print! It may not look completely perfect, but for under $5, it looks pretty darn good! :)